Looking to connect your Samsung device to your computer seamlessly? This article will show you how to install Samsung USB drivers to connect your Samsung device to computer easily.
USB drivers are essential for transferring files, syncing data, and charging your device. Our simple instructions will guide you through installation. We will also offer troubleshooting tips. Our detailed instructions can connect your Samsung device in no time, letting you easily manage and access your files, photographs, and apps.
Why are Samsung USB Drivers important?
Samsung USB drivers play a crucial role in establishing a stable and reliable connection between your Samsung device and your computer. These drivers act as a bridge, allowing your computer to recognize and communicate with your Samsung device effectively.
Whether you want to transfer files, sync data, or simply charge your device, having the correct USB drivers installed is crucial.
Without the proper USB drivers, you may encounter various connectivity issues. Your computer may fail to recognize your Samsung device, making it impossible to transfer files or perform other tasks.
By installing the correct Samsung USB drivers, you can ensure seamless connectivity and unlock the full potential of your Samsung device.
How to download Samsung USB Drivers
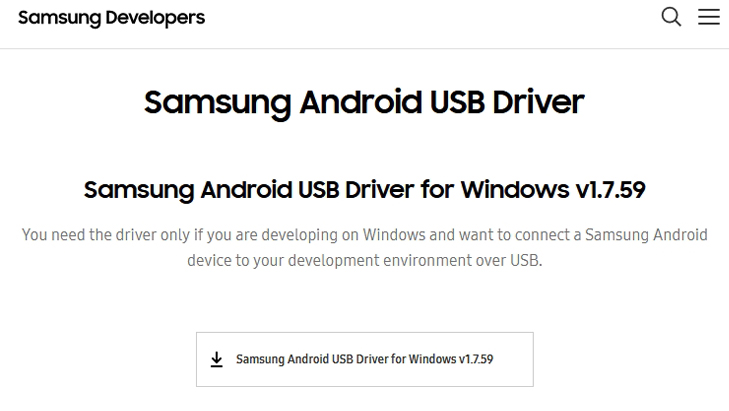
Before we dive into the installation process, let’s first understand how to download the Samsung USB drivers. Samsung provides official USB drivers for their devices on their website. Follow these steps to download the drivers:
- Visit the official Samsung website.
- Navigate to the Support section.
- Enter your device model or search for “USB drivers” in the search bar.
- Locate the appropriate drivers for your device and operating system.
- Click on the download link to start downloading the drivers.
Ensure that you download the drivers from the official Samsung website to avoid any compatibility or security issues.
Installing Samsung USB Drivers on Windows
Now that you have downloaded the Samsung USB drivers, let’s proceed with the installation process on a Windows computer. Follow these steps:
- Locate the downloaded drivers on your computer.
- Double-click on the downloaded file to begin the installation.
- Follow the on-screen instructions provided by the installation wizard.
- Accept the license agreement and select the destination folder for the drivers.
- Click on the “Install” button to initiate the installation process.
- Wait for the installation to complete.
- Once the installation is finished, restart your computer.
Congratulations! You have successfully installed the Samsung USB drivers on your Windows computer. Your Samsung device should now be recognized by your computer, allowing you to establish a seamless connection.
Installing Samsung USB Drivers on Mac
If you are using a Mac computer, the process of installing Samsung USB drivers is slightly different. Follow these steps:
- Locate the downloaded drivers on your Mac.
- Double-click on the downloaded file to extract the drivers.
- Open the extracted folder and locate the installer file.
- Double-click on the installer file to begin the installation.
- Follow the on-screen instructions provided by the installation wizard.
- Accept the license agreement and select the destination folder for the drivers.
- Click on the “Install” button to initiate the installation process.
- Enter your Mac’s administrator password if prompted.
- Wait for the installation to complete.
- Once the installation is finished, restart your Mac.
Well done! You have successfully installed the Samsung USB drivers on your Mac. Your Samsung device should now be recognized by your computer, allowing for seamless connectivity.
Troubleshooting common issues with Samsung USB Drivers
Sometimes, despite installing the correct USB drivers, you may still encounter connectivity issues. Here are some common problems and their solutions:
Device not recognized
If your Samsung device is not recognized by your computer, try the following steps:
- Ensure that you have installed the correct USB drivers for your device and operating system.
- Disconnect and reconnect the USB cable, ensuring it is properly connected.
- Try using a different USB port on your computer.
- Restart both your Samsung device and your computer.
Driver installation error
If you encounter any errors during the installation process, try the following steps:
- Restart your computer and try reinstalling the drivers.
- Disable any antivirus or firewall software temporarily, as they may interfere with the installation process.
- Download the drivers again from the official Samsung website to ensure the file is not corrupted.
- If you are still experiencing issues, it is recommended that you reach out to Samsung’s customer support for further assistance.
Conclusion and final thoughts
With the step-by-step instructions provided in this guide, you should now be able to install Samsung USB drivers on your Windows or Mac computer effortlessly. These drivers are essential for establishing seamless connectivity between your Samsung device and your computer, allowing you to transfer files, sync data, and perform other tasks without any problems.
Remember to always download the USB drivers from the official Samsung website to ensure compatibility and security. If you encounter any issues during the installation process, refer to the troubleshooting section for solutions.
Say goodbye to frustrating connection problems and get ready to experience seamless connectivity with Samsung USB drivers. By following this guide, you’ll have your Samsung device connected in no time, allowing you to effortlessly manage and access your files, photos, and applications.
Enjoy the convenience and efficiency that come with a stable and reliable connection between your Samsung device and your computer. Install the Samsung USB drivers today and unlock the full potential of your Samsung device!